Many of us believe we are not good with people’s names, but I believe we can remember them if we put the effort into memorising them. And there are tools that can help us to memorise by repetition. Anki is a powerful flashcard application that can help you to memorise many things through repetition.
The steps I’m going to show may be very specific to my university, but I’m sure you have got some similar system at your institution/school.
What do we need?
-
Anki for the memorisation bit. You can use it on your desktop or on your phone. Anki allows you to synchronise between devices but you’ll need to be careful whether this is through a public server, as you don’t want to leak your students names and pictures to the wild. If you want synchronising between various devices, you can run your own sync server on your desktop. If you are going to use a single device, then you don’t need to worry.
- You will need anki desktop client for the step of creating cards.
- And an Anki addon: Media Import 2
- Students photos named with their names.
Then opening the media import 2 menu in anki, and following the indications as explained on their website, you can get cards for it.
This is all easy and good… however, the platform at our university doesn’t provide the photos with the names already, and having to do that manually would be a pain with more than 10 students. So, what would you need?
What do we need? (in UCL)
- A browser, I’m using Firefox
- Two browser addons:
- DownThemAll! - to automate the downloading the images.
- GreaseMonkey (or similar) - to do some manipulation so the images can be downloaded with the names we want.
Hands on (UCL)
Once you access portico, get to your module list with the pictures of your students, then when you try to download them using downthemall you discover that the images contain no file names, and what’s worse, the title and description tags say something like “This student has no photograph” 😓.
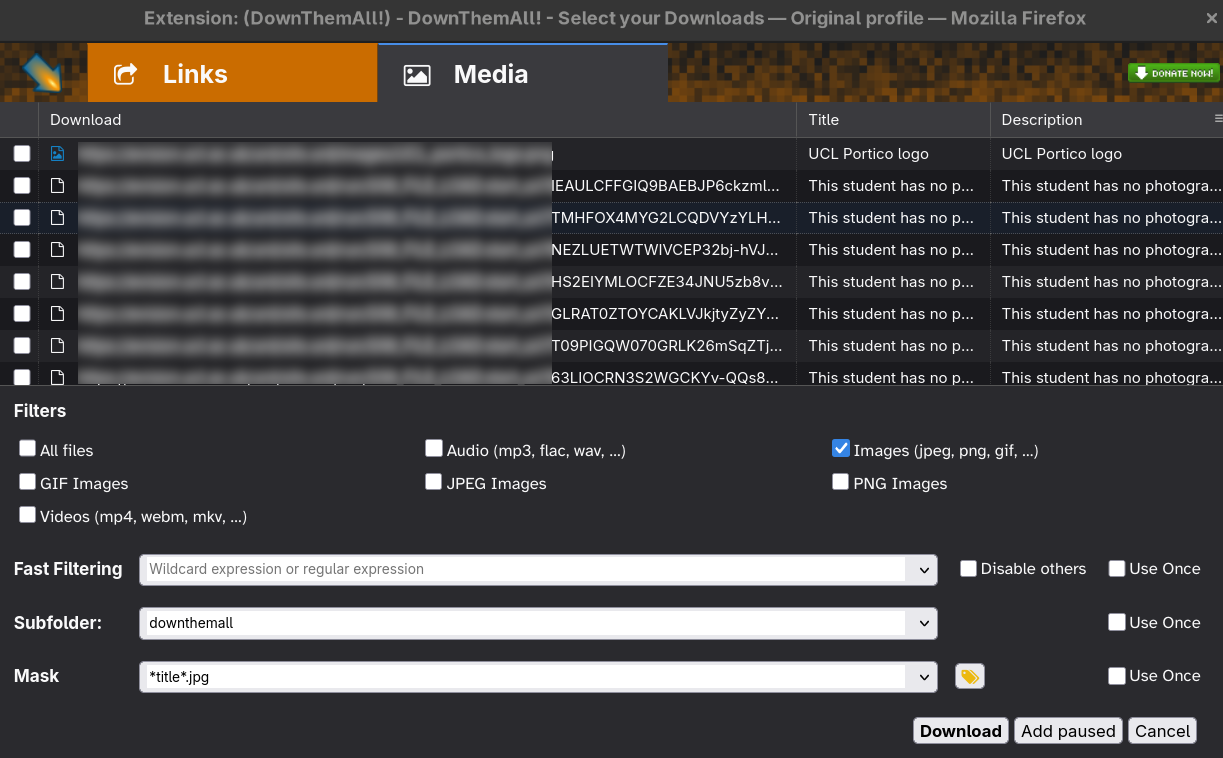
We can’t change the file names directly, therefore we need to change the title or the description, which thankfully downthemall can use them as mask to save the files when downloaded (as shown in the bottom of the above image where it’s asking to save them using the title of each image).
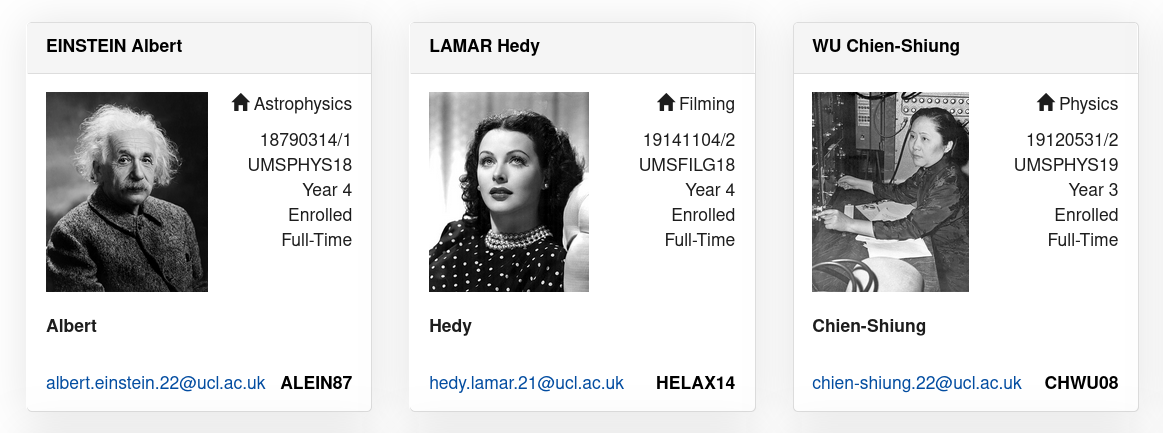
Here’s where greasemonkey comes in. Greasemonkey allows us to modify websites using a bit of javascript. We are going to write a small script that when loading the site modifies the alt attribute for each photo using the names shown below them. This is how the website looks:
And this is the Greasemonkey script to do so:
// ==UserScript==
// @name     portico-students-names
// @version  1
// @grant    none
// @include  https://<url-to-the-page-where-photos-are>/*
// ==/UserScript==


function modify_alt(){
  var students = document.getElementsByClassName("sv-panel-body");
for (item in students){
  students[item].children[0].alt = students[item].children[4].innerText;
	}
}
modify_alt();
This script defines a function modify_alt which then is called at the end of the script. The function gets first all the students cards (which in our case are under a div using a class named sv-panel-body). Then iterates over each of the cards and then adds the alt attribute the text of where the name is.
Looking at the snippet of one of those cards in html,
<div class="sv-panel-body">
  <img alt="This student has no photograph" align="left" width="auto"
       height="160" src="path/to/image">
  <p align="right"><span class="glyphicon glyphicon-home"></span> Filming</p>
  <p align="right">19141104/2<br><span title="MArt Filming">UMSFILG18</span><br>Year 4<br>Enrolled<br><span>Full-Time<sup></sup><br><br></span></p><br>
  <strong>Hedy</strong>
</div>
we can see that the children values of the sv-panel-body are 4, the <img>, the <p> with the degree, the <p> with the student information and the <strong> that contains the name of the student. That’s how we extract the student name and inserted in the alt attribute that Downthemall will use to download the images.
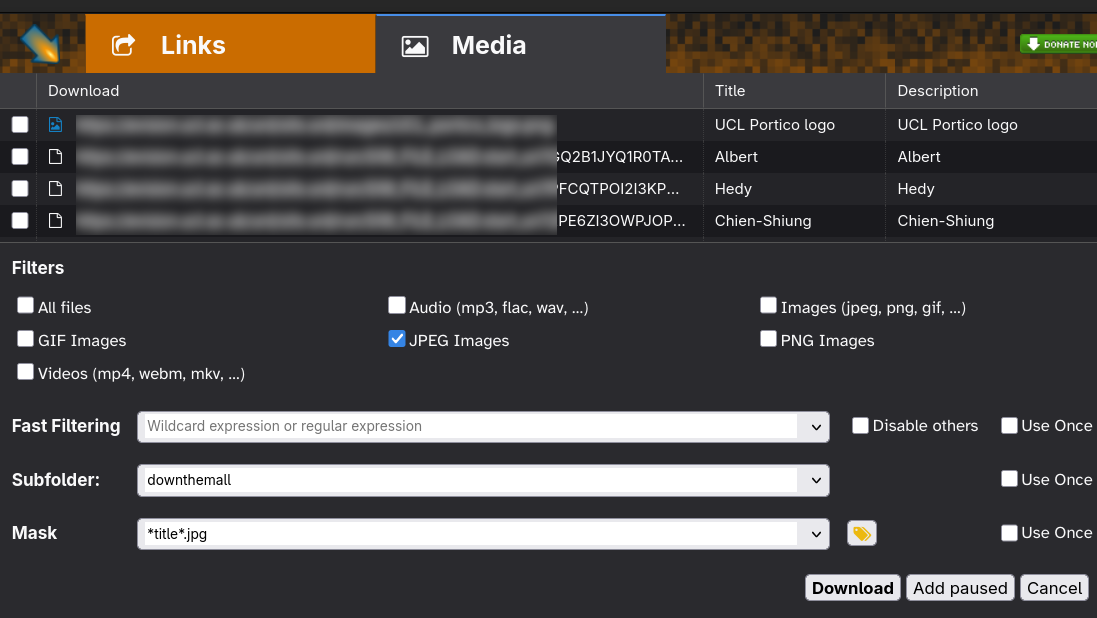
Once activated the greasemonkey script and loading the page, when we open Downthemall we see that the title column (and the description) contains the names of the students as we wanted:
Once you’ve downloaded the images, you can import them with Anki’s Media Import 2 and produce flashcards with the student photo and their name. You can create them as double cards if you want to be prompted with the photo and the name and you have to guess the other.
